Archive
Busy Building

When I Moved In
When I moved into my new home, I had a half completed project waiting for me in the background. This structure was originally intended to be a horse barn, but I’m not the type who enjoys feeding animals everyday nor do I enjoy making or stacking hay in the hot summer. So, I’ve decided to finish the building for use as [ Continue Reading at: http://itfarmersblog.com/?p=2807 ]
Cider Press Complete

Adonica Standing with the Press
For the past two days, I’ve had one item which has topped my agenda: Finishing and testing out the cider press I’ve been working on. A good friend, Adonica in the picture above, heard about my project and … [ Continue Reading at: http://itfarmersblog.com/?p=2502 ]
A Year of Growth: 2011

New Equipment on the Farm
Another year has passed on the farm, and as the old year passes by, it leaves changes much like a glacier grinding and pushing its way to the sea. 2011 brought lots of new equipment and experiences to the farm, including a new John Deere tractor, and a much older yet still very effective 8n Ford tractor. The two tractors work great in tandam, making the hard work of yester-years into play time on full sized toys. The two tractors share lots of interchangable attachments including a back blade, brush hog, finish mower and more. Once we got up to speed on how the tractors worked and what we could do with them, everything changed. Tasks that were difficult became easy, and what was once impossible is now do-able.

Improvements to the Land
With the power of many horses under our feet, we began to transform the land directly in front of my home from a thicket of brush into a smooth flowing lawn, complete with a meandering stream which runs through the center. This will be the land where I continue planting cherries, berries and fruit trees, as I’ve nearly run out of space close to the house. I’ve also found time to build a herb garden with lot’s of old field stones.

New Shed and Workshop
The year has also been shaped a great deal by the construction of a new shed. The idea began as a chicken coop, but as soon as I began construction of the shed in my minds eye I envisioned a work shop and extra storage for many of my tools. The shed demanded a good deal of my time, and I’ve had lots of help with the design and general construction. That project is now complete for the year, and the workshop is quickly being stocked and organized. I’ve built a study building that should last for decades, and its large enough that I have extra room for future use.

First Book
While the sun was hidden from view I put together my first book, which expands upon my first few years in the garden. After returning from work, and putting away my shed construction tools, I would edit, layout and revise my story, producing a 70 + page tale of trials and some errors on my path to master gardening. You can read more about the book by clicking here.

Battling Late Blight
In 2009 and 2010 I had well over 100 tomato plants die due to late blight, and I lost the majority of the tomato harvest to this pest. It’s a difficult thing to loose so much hard work to something which is hard to see, but in 2011 I fought back with the conviction of a four star general. I drew up “battle plans” and stuck to the program, using Epson Salt and “Dragoon Dust” to protect the plants and destroy the enemy.
The blight managed to kill a plant or two, but I treated the outbreak much like the CDC would treat a case of SARS. I carefully covered the infected plants with a garbage bag, then ripped the roots from the soil, being carefull to isolate the infected plant. After torching the exposed plant matter, I redoubled my efforts in blight prevention. I took a doctor’s approach towards treatment, and gave the plants a heavy dose of Miracle Grow to keep them strong, while dusting the area exposed with an extra serving of anti-fungal agents.
At the end of the season it was clear that the blight had not succeded in robbing my harvest yet again. The tomatoes flowed from the garden like water spraying from a badly leaking hose.

Canned Tomatoes
With the endless bounty that streamed in from the garden, we all learned the fine points of food preservation, including canning, freezing and even vacuum sealing veggies. 2011 has been a great year for the garden, with two exceptions: Cucumbers and Zucchini.
I only managed to grow a few cucumbers, unlike past years when I would require a back pack in order to pick a row of cucks. The zucchini wasn’t nearly as bad, but it also suffered due to a thousand bites from pesky ground hogs. Overall, I’m very happy to see so much progress in hind sight. I’ve grown a great deal this year, perhaps more then the last five years combined. I’ve extended my garden season into the winter with Broccolli, Cualiflower and Brussels Sprouts, and I’ve demonstrated stubborn commitment towards shed construction.
Everyone on the farm has been learning and working together very well, and I think the outcome of this years labor is a testement to that effort. I hope to redouble my planning in 2012, and deliver even better results in the new year.
Happy New Year !
– I.T. Farmer
You may also like:
 Equipment Roundup
 Here Comes The Work Part of Winter
 Herbs
Herbs Spring Onions
 The View From the Top
 The other end of the farm…
 Getting Serious About Organic Fertilizer
 A Good Year for Apples
-

- New Equipment on the Farm
-

- Improvements to the Land
-

- New Shed and Workshop


-

- Battling Late Blight
-

- Canned Tomatoes
-

- First Book
Ladder and Lights

Ladder
I only have a few major components to finish before I can call my shed complete, but before I totally enclosed the second story, I figured it would be a good idea to add a ladder and some light. I decided to use some left over 2 x 4’s as the ladder base, with 2 x 3 rungs. After nailing the whole thing together, I added some railings that I made from some left over facia boards. I plan to hang a piece of plywood on some hinges and attach those to the railings to produce a very accident free ladder system.

Fluorescent Lights
When the ladder was complete, I hung the first of three large lights. Hanging a light by yourself can be very frustrating, so I cheated a bit by using an extension cord as a pully system to hoise the light into place. Once I was happy with it’s location, I tied the cord around a nail to secure it in place, and used the screw gun to permantely attach the light. After adding three lights, I ran some electrical wire and installed an On/Off light swtich.

Switch - Made in America
After turning the light on, I saw that the light switch was made in America, which made the accomplishment that much sweeter.
You may also like:
 Shed Progress: Fascia and Drip Edge
 Stubborn Progress
 This Old Barn: Part 2
 Chicken Coop Plans
 Rome Wasn’t Built in a Day
Unconventional Door

Door Closed
I finally got enough other work done to begin constructing the first door for my shed. I built the basic frame, and with Davies help attached it to the hinges. At this point, I decided to take a break. I had an idea for how I wanted to build my doors, but these doors would be like no other, so I decided to take a few hours and think about it while working on another project.

Cracked Open
After clearing some brush I decided I was going to go through with my somewhat radical plan. The doors would overlap each other, and fit together like doors in an air lock. Why did I build these odd looking doors ? Mostly because I could, but this design eliminates the vertical gap that usually separates two doors. Without the vertical gap, less air will leak through in the winter.

Doors Open
So there they are, my unconventional doors. Whatcha think ?
You may also like:
 This Old Barn: Part 1
 From the Ground Up
 Roof Framing
 It’s Getting Hot in Here….
 Moving and Sheeting
 George’s Free Range Chickens
 Made in America
Weekend Roof Work

House Side
After a great deal of work getting the shed ready for the roofing, I was ready to get this portion of work over with. Of all of the stages of construction, roofing is the one stage that I lack a good amount of experience. While the rest of the project reminded me of building with Legos, the roof was more like building with playing cards. I still need to cover the back side’s top half, but first I need to find a way to transport some sheeting from Home Depot, 30 miles to my home, without placing it on the roof of my car.

Landing Covered with Rubber Roofing
After covering the side of the roof which faces my home, I switched gears and materials. The flat landing on the roof requires a bit of creative construction, and after asking many questions, I’ve decided that rubber roofing would be the best material for this flat spot.
I had to plan ahead here when considering how the water would flow from one material to the other. In the places where the peaks were higher then the rubber material, I needed to make sure the tar paper would overlap the rubber. The same rule would apply where the tar paper was lower then the rubber, and so would need to go underneath. The trickest parts were located in the transitions would one material would be higher at one point, and lower at another. This occured in four places, where the flat portion met the peak portion (look where the tar paper meets the rubber beside the uncovered portion of the roof).

Half Way
By the end of the night Friday, I had covered half of the roof, and after a few visitors Saturday morning, it was time to get back to work. The tool I was using to secure the staples resembles a hammer, and that’s primarily how it’s used. You slam the head of the stapler into the material which should be held in place. The staple gun uses the force to deliver one staple up to 1/2 inch deep into the material below. Needless to say, when you go through two rows of staples every few minutes, it makes a lot of noise.

Far Side After Rain
By Sunday morning I had the roof covered, and that saved me from disturbing all my Amish neighbors on their day of rest. It was raining, so I took some time to inspect my work and ensure there were no leaks.

Drip Edge
During the rain, the drip edge was functioning as it’s name implies. If I decide to place gutters on this shed, the drip edge will help the rain land in the gutter, rather then run behind it.

Flat Spot Holding Rain
I even climbed up to the top to inspect my flat rubber roofing. I was quite pleased to see water poling a bit, rather then leaking through.
All in all, If I had to grade this roof as a teacher would grade homework, I’d probably give myself a B-. Why wouldn’t I earn an A ? See that hole in the rubber roofing ? I forgot to build a cover for it, so rain still hits the floor below.
Now I just need to find some financing for shingles…..
Shed Progress: Fascia and Drip Edge

Weather Treated Boards
I’ve been playing around on the tractor quite a bit lately, but I knew it would soon be time to get back to work. The shed still needs sheeting to cover the back portion, but that will have to wait. My priority at this point is to get the plywood on the roof covered with a layer of tar paper, which will protect the wood from the elements. After the tar paper, I can take my time and save up for some shingles to finish the project.
For now, the name of the game is to attach the weather treated boards to the top of the building, in place of fascia boards. I’ll then attach the drip edge to cover these boards, and only then can I lay down the tar paper. I’ve decided to use weather treated boards since I’ve seen so many buildings in my short time that require work in this area. Once water passes beyond the outer board, it will start eating away at the roof and internal supports. I’ve got a mind to stop this decay before it ever gets a chance to gain a foot-hold.

Paint
In an effort to save myself some work, I decided to paint the boards before cutting and attaching them to the second story. This should save quite a bit of time moving around a heavy ladder, and standing 20 feet in the air with a bucket and brush. I will still need to climb the ladder, but only to seal up the area where the two boards join. I’ll be sure to give this area several heavy coats in an effort to completely fill the crack, and prevent all water from entering.
When I opened the paint can, I was a bit surprised by the color that presented itself to me. I was expecting a dark brown, but what I saw was a pinkish purple. Since I’ve had my fair share of time with a brush in my hand, I knew the paint would likely dry in a different color then shown, but I couldn’t help but worry about what my family or neighbors would think if my new shed had purple trim. Thank goodness it did dry brown, and I was able to put those worries to rest.

Drip Edge and Fascia
Hanging the boards was real exercise in teaching myself how to do something I had never tried before. The first interesting lesson was finding the correct angles to cut the boards at. My simple answer to this problem was by finding a small piece of wood that had a square corner. I placed one edge of the board onto the base below, letting the other edge extend past the roof. I then used a pencil to mark the angle of the roof. The next step involved lining up my mark with the board, and tracing the opposite edge that was previously flat against the board below.
Once I had that mastered, I began the second phase of learning: attaching a lopsided board to the side of a building while balancing on a board less then two feet wide. I devised a rope system to hold one end of the board in it’s desired area while I was able to line the other end up to it’s correct placement. Once I figured out this rope system, life got a whole lot easier, and I actually made some progress.

Front of Shed
So here is where I left off last night, after moving the scaffolding to the rear of the building. It’s starting to look pretty cool, and I can’t wait to see the whole structure complete with trim, and dual opening doors. It will be nice to be able to work in my flat bottomed workshop rather then constantly looking over the edge of the scaffolding, but I’m sure once this shed is complete, my work will just be beginning. I can already hear whispers from Saint Nick and the elves already planning their winter run…….
Stubborn Progress

Shed Progress
I made a great deal of progress on my shed over the weekend. I’ve finally completed a fix on the edge of the roof where the overhang was too short, and I got the front portion of the sheeting cut and placed. I’ve called it stubborn progress as it took quite a bit of will power to keep working after the sun had zapped a great deal of energy out of me. I worked slowly, kept a bottle of cool water nearby, and constantly rewarded myself by looking at the progress from a distance.
In order to secure the sheeting near the peak, I had to place the ladder shown against the scaffolding and climb to the top. I tied the ladder to the interior roof joists for added insurance. Maybe it was a bit paranoid to tie it up, but I’ve broken a few bones in the past, and even though the heights don’t bother me, the idea of spending another summer in a cast does.
So now I’m looking at my ever shortening to do list, and it’s starting to feel like I might just be able to pull this off:
1.) Finish the back portion of the sheeting, and roof eaves.
2.) Place drip edge around the perimeter of the roof, and lay down a layer of tar paper.
3.) Place the rubber roofing on the flat portion.
4.) Install the roof shingles.
5.) Cover the base of the roof overhang with OSB.
6.) Add some brown trim
7.) Run a more permanent electrical connection via a buried line in steel tubing.
8.) Add interior insulation to keep me warm while I’m building furniture in the winter.
For now, I’m looking forward to a day free of soreness. I’m not used to climbing up and down a ladder all day long. Oh well, the permanent result is definitely worth the temporary sacrifice.
Rome Wasn’t Built in a Day

House Side
I’ve been working steadily on my shed since spring, adding boards after work, or sheeting on the weekends. I’ve found it’s taking much longer to complete each step then I originally anticipated. I’m sure it doesn’t help that I keep adding to the project, first with choosing to build a very large chicken coop, then with a shop on the second story. It all brings home that old saying I first heard as a child “Rome wasn’t built in a day”. When I first heard that expression, I thought it was non sense, of course it took more then a day to build Rome. At the ripe old age of about seven, I had it all figured out, and determined without much thought that Rome took at least one year to build, or less. This nonsense of building a city in a day was absurd, but it surely didn’t take too long.

Field Side
After growing much older and working on a few projects such as my greenhouse, I began to appreciate the amount of effort that is invested in construction. I’ve learned a lot in these last few years about what will work and what will not. I originally tried to construct a greenhouse using 3/4 inch PVC pipping, shaped in a geodesic dome type construction. I still think it could work, but I arranged my supports incorrectly. I guess my point is, for every project that works out, there are projects that do not, which adds even more time to the equation.

Landing
I’ve gotten the roofs frame completed, with the landing shown above. I hope to cover this over to create a flat spot for astro-photography. The small box in the photo will be a opening to the lower floors. I’ll finish the whole building, and place a rubber roof over this spot. Later I hope to create a very small telescope and two person sized dome on this landing, but that will be a completely separate project.

Front View
So here it is, and here I am, 23 years later. I still wonder about that saying “Rome wasn’t built in a day”. I guess in the grand scheme of things, Rome is never really finished. Construction must still be continuing in some part of the city, and so it’s never totally complete. I do have a better grasp on the meaning, and a better understanding that things really do take time, sometimes lots of it.
Roof Framing

Shed with Scaffolding
I’m still working on my shed, with the light at the end of the tunnel now in sight. I have the roof frame complete, and I’ll soon begin laying down sheets of plywood for the roof itself. I’ve borrowed some scaffolding to make the work much easier, and I’ve found it can be quite complicated to get the second level scaffolding in place without help.

Roof Frame With Landing
I’ve left a small landing on the roof that I’ll make flat, and cover with rubber roofing. There will be a small trap door which will open up from the story below, and this should give me a nice perch for browsing the night sky with a telescope. Eventually, I’d like to place a very small room with a dome on this landing, but I really need to keep in mind that this whole project started as a chicken coop, and that’s my primary objective. I’ll leave the landing as compatible to the extra plans as possible without adding additional construction until the rest of the building is complete. I’ve also constructed the landing in such a way as to allow it to be seamlessly covered over in case it’s later deemed necessary.

Roof Frame as Seen from the Landing
So here is the view from the top of the roof looking down through the second story. It wasn’t quite so dark outside, but the camera flash seems to increase the photo’s contrast so much that only the foreground object find their way to the photo.
I guess I should really begin researching basic telescope construction techniques with camera mounts so I can share some of the photos I hope to take.
IT Farmer
 in Northwest Pennsylvania")
The Information Technology Farmer (IT Farmer) in Northwest Pennsylvania
NWPA Backwoods
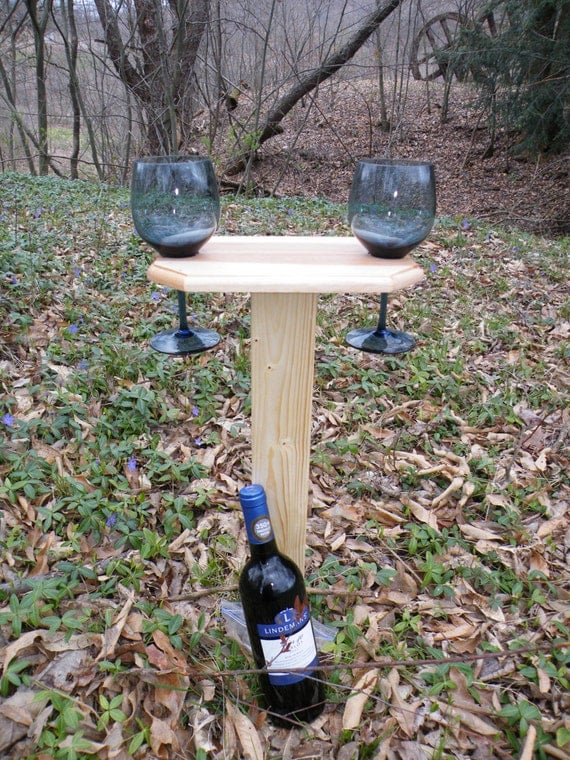 Outdoor Wine Glass Holder
I.T. Farmer’s Journey

Fight Global Warming

CO2

Going Simple

American Farmland Trust

ClustrMap


Comments: