Archive
Garden Stromboli

Peppers, Onions and a Hamburger
Finding something to eat for one person often is very easy, but unhealthy. This little recipe to pretty easy to work through, and I imagine it’s quite healthy too. The ingredient list is short:
1.) One or Two hamburgers
2.) A chunk of butter
3.) One or Two large peppers
4.) A medium to large onion
5.) One roll of Pillsbury Bread sticks with Garlic.
6.) One small jar of spaghetti sauce.
7.) Shredded Cheese
8.) Olive Oil
9.) Optionally add minced garlic and other veggies such as tomatoes, celery, zucchini, etc.
To begin, cook the hamburger meat in a frying pan with a chunk of butter, carefully crushing the patty into ground meat with a spatula. Add in chopped onions and peppers when the meat is nearly cooked. At this point you could add other veggies and chunks of a garlic clove.

Garlic Sticks
Next, place some aluminum foil over a cookie sheet, and spread some olive oil on the foil. Make sure to spread it around evenly. Unroll the bread sticks mix onto the foil. You may wish to cut the dough along the lines in order to make two smaller Stromboli.

Sauce, Hamburger, Onions, Peppers and Onion tops
Spread the spaghetti sauce on the uncooked dough, then add the chop meat and fried veggies, even distributing them. I’ve added some chopped up onion stems to the mixture, as well as lots of garlic salt and a bit of pepper.

Fold Over and Pinch the Dough
Next, fold over the dough, and pitch it together. You may notice in the photo how I had used tomato paste and added Swiss chard to the mix. Don’t do that ! The paste and chard together made these Stromboli taste like a bar of iron.
When you’ve sealed up the pockets, place them in the oven and bake until the dough turns a nice brown. I long ago lost the temperature setting knob from my stove, so I’d recommend you use the same method I did, start with a low temp, and slowly turn it up till the dough cooks.

Light Brown Color Means it's Done
You may wish to add additional veggies to your Stromboli, but I’d recommend you cook them before placing them on the uncooked dough. The stove doesn’t cook the veggies in the amount of time it takes for the bread to darken.
Some things to remember:
1.) Do not use Tomato Paste in place of the Spaghetti sauce. It’s gross.
2.) Swiss Chard will overpower all of the other tastes, and in my opinion ruin the Stromboli.
3.) Use olive oil on the aluminum foil. Without this protection, the dough will stick to the foil and make a mess.
Hope you like this recipe as much as I did when I got it right !
John and Martha’s Garden

Peppers and Tomatoes
My neighbor John noticed that we have been using the tractor and brush hog to mow the field around my house, and he wanted me to stop up and see about mowing some of his fields. While I was there, I thought it would be neat to take some pictures of John and Martha’s garden. The family is one of many Amish households in the area, so they always grow a garden, regardless of the current state of the economy, but they too are expanding the size of their plot for next year. In the background is the field which I’ve been mowing with the tractor. Since it’s taking so long, Davie has offered to help while I’m at work. The two of us should be able to mow the whole thing before winter.

Banana Peppers
While I generally grow bell peppers, the neighbors usually grow banana peppers. I guess I should ask them where they get their seeds from because I have only started to see flowers on my pepper plants.

Cabbage
Their cabbage is also doing great, and although I don’t like eating this veggie much, I’m a bit jealous as I’ve never had much luck growing these plants, and theirs look phenomenal.

Onions
Their onions are a bit taller then mine, but here I don’t feel so bad. My patch isn’t nearly as weed free, but my plants are about the same size.
I also transplanted my Pak-Choi out to the garden over the weekend, and sowed some additional cucumber and zucchini seeds, which should have just enough time before winter to grow food.
Corn, Celery & Onions

Corn
My corn is about 8 inches tall, and I really don’t think it will reach the “knee high by July” standard that most farmers judge their crops by. I’m not worried however, as this corn is more in the range of 70-80 day corn then 90+. I had similar sized corn last year, and had way too much then. This years corn plot is about a third of the size as last year, and should still deliver plenty.

Celery
This is the first year I’ve had celery plants in the garden. Last year, I tried to plant the seeds in a row and it didn’t work too well. Celery is a slow growing plant, and should be started 11 weeks earlier then the last frost. The little plant above is approximately 20 weeks old, and less then 6 inches tall.

Yellow Onions
Everything and Cheese

Swiss Chard / Mac and Cheese
I tried something new with some Macaroni and Cheese the other day: I added Ground Beef, Onions, Carrots and Asparagus to the mix, then wrapped it all up in some Swiss Chard. It actually tasted pretty good, and I’m sure it adds to the vitamin content of the mac and cheese. So here is how I made it:
Cook the noodles as directed on the packaging. While the noodles are boiling, throw in some frozen onions and carrots.
Place a pound of ground beef in a frying pan with butter, then stir in a half a can of Asparagus, and some minced garlic.
When the noodles are nearly cooked and the beef is thoroughly fried, mix the beef into the pot of water. This is an unusual step, but it makes stirring in the cheese easier. When the noodles are cooked strain, then add the cheese packet.

Everything and Cheese
The mac and cheese is very good with or without the Chard. Now I’m wondering how the whole thing would taste if placed in a deep fryer…. Maybe next time I’ll give it a try.
Weekend Roundup 8/29/10

Morning View of the Valley
I’ll admit it, Saturday, I slept in, and really didn’t do much of anything other then take pictures for my sister. So when I awoke Sunday, I was rearing to go, and not in the mood to sit around. I got up and out early enough to catch the morning sun, finishing up with it’s daily burn off of the nights fog. You can still see some of the once all-encompassing cloud by the foot of the hills.

Weekend Harvest
In the afternoon Sandy and Davie came over, and we finished harvesting the onions, and learned it’s a bit late in the season for them. Some of the Onion bulbs had begun to rot. Next year I’ll make it a point to finish picking them by the beginning or middle of August.
The string beans have collapsed half of the stick constructed trellis I made for them, and the beans shown are only about a third of the crop. Also shown are Okra, my least favorite garden food. The plants grew very well, and produced a healthy offering of seed pods.

Watermelon
The little Gardener’s Watermelons are just starting to ripen up. My sister Sandy discovered a great rule of thumb to tell when a melon is ripe: It’s ripe when the little worms and bugs just start to nibble a bit at the outer shell. Once they know it’s ripe, we should know it’s ripe. I also made it a point to show the 4 year old gardener that started these plants what he accomplished. When I asked him if he would do it again next year he said “No”, I replied “Why not ?”, to which he said “It takes tooooo long”. I guess the lack of instant gratification is a symbol of ones age.

Garlic Planted Early
At the end of the day, I decided to plant the Garlic a few weeks early. Garlic should be started early enough to give the plants time to build a basic set of roots before freezing temps set in. I’m hoping the early planting helps them grow nice big cloves. I’ve added several things to this soil to help out the plants, including bio-char and peat moss.
Sausage, Peppers and Onions

Cooking The Sausage
I like to eat some of the freshest food possible, as it really makes a noticeable difference in my health. For dinner, I thought I would cook some sausage, mixed with Peppers and Onions. This recipe is one of the first things I learned how to cook, and was taught to me by my father. The ingredient list is simple: Sausage, Onions, Peppers, and a Bun. While cooking it, I decided I would post this recipe. It took me a long time to pick up cooking skills, so I hope it helps someone out there with theirs.
The first step was pretty simple: Follow the directions on the package. Here is the basic version: In a non-stick skillet, combine with half a cup of water, 1 tablespoon of oil and sausage. Bring to a boil, reduce to medium heat and cover the skillet. Simmer for 12 minutes. Simple enough, this will cook the meat to the manufactures specifications.
I added a step, as shown to me: Remove the sausage from the pan, turn the heat off, wash out the pan, and place it back on the burner. Add 1/3 stick of butter, turn the heat back to medium-low. Add in sliced peppers, onions and the sausage. Stir it occasionally to keep if from sticking. This added step will brown up the sausage, and encourage flavors from the veggies to flow into the sausage. When the sausage is brown, and the onions have a darker color, it’s done.
You could also add in Spaghetti Sauce while cooking, for a different flavor. This makes a wonderful topping for hot dogs if you leave out the sausage.

Ready to Eat
Next you can choose to either eat it as is, or add it to a bun. I choose the later option, and added Provolone cheese to the mix.
This particular meal produced five sausage sandwiches, and if I didn’t have to buy the Green Pepper, the total cost would have been $6.76. Not bad !
First Market Offering

First Market Offering
So here it is, my first market offering. I’ve very excited, and can feel the added electricity flow through my veins as I prepare. This is the point where I find out just where this gardening hobby will go from here. Will it become more then a activity I do for relaxing, and an actual source of income, or will it remain a way of saving money ? Either way, I will continue to grow massive gardens, hopefully for the rest of my life. I’ve grown quite fond of feeding myself on a whim, with food that’s super fresh, and abundant. It’s also quite humorous to watch the kids give tours of the garden to their friends….
I sit wondering how it will all turn out. I delivered my produce to my neighbors home; they were not there, so I piled the produce up on chairs on their porch. They are Amish, so I couldn’t call to double check the plans, I had to make a choice: Either drop it off and hope for the best, or wait for next week. I figured since I rarely gamble, I’d try my luck and see what happens. Worst case scenario: ground hogs, rabbits and vultures eat it; I’m not worried though, this is simply the start of the season. I’m sure with all this rain that has suddenly found it’s way here, more cucumbers will pop out of the ground.
Here’s hoping for the best !
Harvesting Onions

Nate Checking his Email
It seemed like as good of time as any to harvest some onions. I’m still new at this, however if you don’t try something new, you will never learn. I have four rows of onions, and decided last week to begin the “curing” process. When the onions start falling over on their own, you start by knocking the rest over. This encourages the plant to put all it’s final effort into making a healthy bulb.

Nate Carrying Onions
In the background is a wall of weeds, which seems to help with keeping out critters. I haven’t had much damage other then the lost lettuce.
As I picked the onions, I handed them to Nate. There were quite a few, and he made several trips to the greenhouse. The water tables would become our onion processing area. Everything seemed to fall in place quite well.

A Pile of Onions
Here is the final pile of onions. I added the bottle of Dawn to show some size, and it was the only object around that would be of uniform size from house to house. There are also some Zucchini to the right. The next step is to cut the bulb from the green portion of the plant.

Lots Of Onions
When cutting off the tops, it’s important to cut an inch or more above the bulb. If you skip this step, or cut to low to the bulb, your onions will not properly cure, and may rot in storage. The final step is to leave them to dry in the sun for a day. I figure the greenhouse would be a good of a place as any, and they are drying out as I type.
Update: The greenhouse is far too hot for curing onions. When checking on them around 3:00 PM that day, the tempurate was 100 F. I moved them outside, and constructed a drying rack for future use. In total, they were drying for two days in the sun.
Harvesting Onions

4 Varieties of Onions
Many things in the garden are still new to me, such as when to harvest onions. I did a search on the internet, and found out that any time is the right time to pick them. The key to a good long lasting onion is how you harvest it. Here is a very good explaination from the National Gardening Association. The basic idea is to allow the bulb time to “cure” so that it will not rot in storage. Above you can see four types of onions I’ve started this year. Some are doing better then others, and I suspect the placement of manure is the reason. I’ve placed a brick into the picture area to show size.

Before and After
After reading the tutorial, I pulled one onion, and let it sit in the sun for a day. On the left of the photo above, is the first onion set out, and the right onion was freshly picked. Notice the changes to the roots ? In the left, they have started to wilter and dry, whereas on the right they are still healthy. This is an important step, and I really recommend visiting the Garden.org site mentioned above. Last year, I had not known about this process, and all of my onions were rotten before Christmas.
A Broader View of My Gardening Ambitions

The "Entire" Garden
Here’s a picture of my larger garden, the one that includes Fruit Trees, Grapes and Various Cherries and Berries. The idea I’m shooting for is to build a more permanent garden around my seasonal garden.
The tall posts placed in the ground support five strings of cable, which will eventually hold grape vines. Most sources suggest two or three strands, which are actually part of the pruning process. My plans differ due to the plans for these grapes. There are ten different types of grapes, and I hope to let them grow out of control for several years. This will create a massive set of roots. When the plants are large enough, I hope to use these out of control bushes as a source for cloning canes. I’m not interested in the quality of grapes which will grow from these vines, I’m interested in plants that can support heavy cuttings each year. I can use these cuttings in my process of cloning, from which I can grow quality grapes. It’s generally a long term plan.
Next to the grapes, and barely visible in this photo are some Tart Cherry Bushes. They set lots of medium sized cherries, that are used mostly for pies. The row past these contain Elderberry bushes, a personal childhood favorite.
Towards the left of the photo are the some Fruit Trees. They run across the crest of a small hill which is not really visible. I have Pears, Apples, Peachs and recently added Plums.
Out of the range of this photo are many more plants, but include the following: Apache Blackberries, Sea Buckthorn, Pixwell Gooseberries, Saskatoon Blueberries, Conventional Blueberries, Niagra Grapes, more Tart Cherries, a couple Lilac Bushes, and a few more Fruit Trees.

Tomatoes and Peppers
I also wanted to include a picture of my tomato rows. It was taken after a heavy rain, which is why the peppers look so worn out. This year, we managed to plant everything in fairly straight rows, that look quite amazing from across the valley. I still haven’t quite figured out why I planted so many, nor what to do with them when I get overwhelmed with hundreds or even thosands of tomatoes……. Should be interesting.

Onions Going To Seed
I also wanted to share this very unique photo, which showcases an onion plant in it’s seed growth stage. Each of these little white pods contains the potential to start a new onion plant. I’m not sure if the timing of this is right, or even a good thing, but I’m pretty sure if I let them all sprout seeds, I’ll never have to plant onions agian. I don’t think I’ll ever be able to grow a different crop in this part of the garden if I do let them turn to seed. I guess you live an learn what you can.
IT Farmer
 in Northwest Pennsylvania")
The Information Technology Farmer (IT Farmer) in Northwest Pennsylvania
NWPA Backwoods
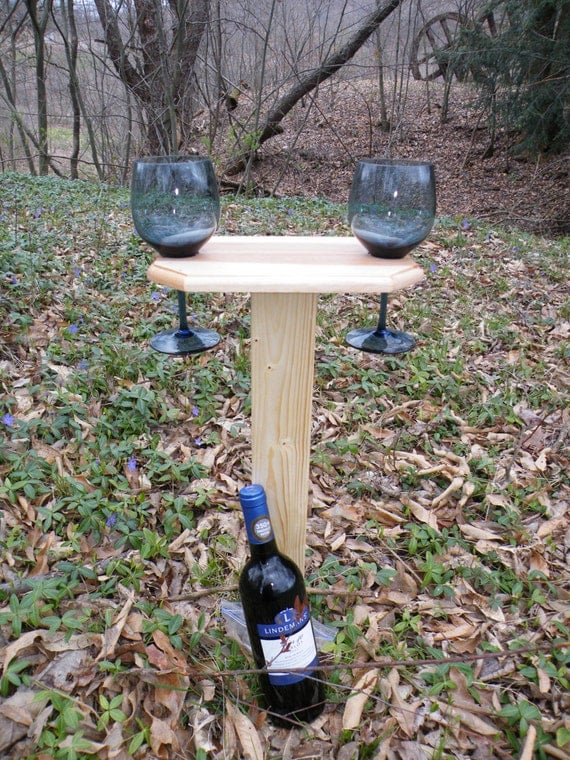 Outdoor Wine Glass Holder
I.T. Farmer’s Journey

Fight Global Warming

CO2

Going Simple

American Farmland Trust

ClustrMap


Comments: