Archive
My Sea of Green has Arrived

Fierce Competition for Sunlight
Things have been pretty busy on the farm, but there is one truth that is self evident: The shelves in the greenhouse are covered in a healthy green mass of plants yearning for the sun. All of the hard work invested in constructing this gem of a building, starting with diging the foundation by hand all the way through attaching the clear panels with help from Nate, is paying off once again. The planning is detailed, the outcome is not always assured, but with a little faith, lots of help, and some good dirt, it’s all working out ….. [ Continue Reading at I.T. Farmers new home: http://itfarmersblog.com?p=2620 ]
In The Greenhouse

"Gabriella" Lettuce

"Oakleaf" Lettuce

"Zesty" Mesclun

"Classic" Mesclun
I could have planted all of the above lettuce and mesclun seeds directly in the ground provided the rain would stop, and give me a chance to work the soil. I’ll move these cups outside once the climate snaps back and the sun emerges from it’s spring slumber. I’m trying some new greens with the “Zesty” mesclun, and growing more of my favorite greens, classic and colorful mesclun and lettuce.

"Brandywine" Tomato
Here’s how my “Brandywine” Tomatoes are looking…. I started a bit later then last year, and moved them out to the greenhouse earlier. I’m on my third bottle of propane this year, compared to a single bottle last year. I’m still hopeful that these late starting plants will out-grow last years, and their growth seems to re-affirm that hope, but only time will tell.
Moving and Sheeting

Placing Skids
My mother stopped by the other day to see how the greenhouse was fairing, and when she took a look at my chicken coop project she explained all the reasons why I would have to move it. The chief reason was it’s location under a power line, which didn’t bother me much, but might be a problem if the power company needs to do work on the line. I finally agreed the the shed would need to be moved, and I began picking my Brother-In-Law’s brain about how to move it. His idea was simple, cut down two trees, place the trees under the supports, attach the building to the trees and then drag the shed through the mud like a sled. The whole process was pretty amazing to watch, as we jacked the building down off it’s blocks and dragged it across the yard with a truck. Once we had the building far enough away from the line, we jacked it back up, placed it back on blocks, and started construction again.

View from the Top, Left Side
I didn’t really want to move this shed in the beginning, but once I climbed up onto the rafters that will hold the second story floor, I knew this was were the shed was meant to be. Above you can see the hay baler still sitting in my front yard, with my row of pruned fruit trees flanking it. The main road is about 1/4 mile as the crow flies from where I was standing.

View from the Top, Center
In front of the shed I hope to make a tomato only garden, with only 40-50 plants maximum. This will allow me to invest the proper amount of time caring for the plants, and watching out for the first sign of blight.

Preparing for Sheeting
On Saturday, we set out to purchase some exterior sheeting. I was actually looking for a material I’ve always known as “Texture-211”. Instead we found a very similar covering material that was $10 a sheet cheaper and it was already painted with a base coat. I’ll take cheaper, easier and better any day !

Nailing the Sheeting in Place
The sheeting went up quick enough, and we finished it up just before dark. The next step in the process will be to cut out and hang the windows, then place some more 2 x 6 floor rafters, and continue pushing skyward.

Asparagus Roots
After all of the construction on Saturday, I decided to take it easy on Sunday. While catching a break between rain drops, I planted some Asparagus roots along my back walkway. They are said to produce good yields for 15 to 20 years, so hopefully this one little task will pay off year after year.

Cups with Seedlings
Finally, I’ve began taking photos from a tri-pod that I’ve set up in the greenhouse. Here’s the first photo of many that I’d like to string together into a little animation. If I take one photo a day, it should make a very cool short clip showing the plants growth at an accelerated pace.
Endless Cups

Endless Cups
The weather is warm enough now to trust in the safety the Greenhouse provides. I have an electric heater attached to an auto-magic temperature sensor to provide the first layer of defense, with a manual start propane heater to use in case of extreme cold.

"Number Five"
The propane heater is a dual burner gas heater that looks a great deal like the robot named “Number 5” from the 80’s movie Short Circuit. This amazing piece of technology will heat the greenhouse up by 10 degrees F in about 10 minutes on the low setting. I was worried about the temperature dipping to 33F last night as the weather predicted, so I turned Number Five to the low setting, and lit a single burner. When I checked on the Green House this morning, the temp was at 60 F !

Half of the Water Tables Covered.
The shelves are fulling in about as quickly as last year, but I’m really taking it easy with the tomato seedlings. I’ve only started about 150 plants, and most of those are paste tomatoes. I figure this year I’ll be able to take better care of a few plants. I’m planting far more Peppers, and I’m expanding my line up a bit with Eggplants, Artichokes, Celery, Brussels Sprouts and even Cauliflower (Gasp !). I even found the time to plant five flavors of lettuce, and four herbs, including Chives, Basil, Parsley and Sage.

Pepper Seedlings
So here’s where I’m at in my growing season, with tiny seedlings reaching towards the sun. In a few short weeks, these plants will transform the greenhouse into a small tropical jungle, with many plants growing to 16 inches tall.


Water Carries Life

Natural Spring Water
While leaving the farm on my way to work this morning, I noticed one of the natural springs flowing a bit more then usual. It was nice to see this ribbon of green growth, after the recent snowfall, and it’s the perfect picture for an entry about water. Most of us (If your reading, your part of us) have running water at a whim. We simply open the faucet, and out flows clean water. What we don’t see in our water is the life giving properties of this liquid. It’s the perfect carrier for the building blocks of life. There are three main types of minerals that plants use which water will carry, including Primary and Secondary Macro, as well as Micro Nutrients.
When growing seedlings, or watering a garden, you need the right amount of water to allow minerals to be absorbed. If there is too much water, the roots will rot due to a lack of Oxygen. If there is not enough water, the plants will be unable to absorb enough nutrients.
Here’s the simple system to manage water which I was taught in my first years gardening, something I expanded upon due to laziness/efficiency:

Watering Seedling in the Greenhouse
Start with styrofoam cups, poke holes in the base, and fill with miracle grow. Place the cups in a tray, and add water to the cup. While this works very well for 20 plants, when scaled up to 200 it’s a bit time consuming. To make life much easier, fill the base tray with an inch of water. This much water will last at least two days in my greenhouse, and I can water 1000 plants in less then 15 minutes. In the photo above, I’ve separated different varieties of plants in each tray, which makes organizing easy too.
IT Farmer
 in Northwest Pennsylvania")
The Information Technology Farmer (IT Farmer) in Northwest Pennsylvania
NWPA Backwoods
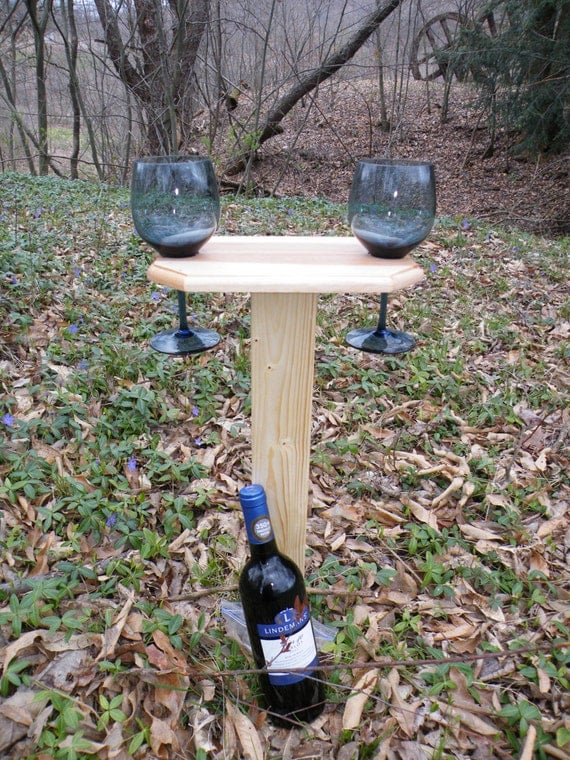 Outdoor Wine Glass Holder
I.T. Farmer’s Journey

Fight Global Warming

CO2

Going Simple

American Farmland Trust

ClustrMap


Comments: