Archive
Halloween; A Transition to Cool Crops

Bright Lights Swiss Chard
As I observe more and more of the subtle hints of seasonal change, I’m starting to find dates on the calendar where changes become permanent transition points. Halloween has become my new marker on the calendar for the absolute end to warm season crops, and the transition point to the cool season.
I’ve made a conscious effort to extend my growing season by incorporating new plants which can tolerate cool and downright cold weather. The most cold hardy plant I’ve got in my arsenal thus far is Swiss Chard. These colorful leaves are willing to grow straight through our harsh winter months if given a simple plastic cover to keep the snow from burying the leaves.

Lettuce Under Snow
I was surprised to see some lettuce also growing through the snow. The lettuce above is from my sister’s garden, as my lettuce is not very photogenic due to a recent pass through the garden with the finish mower. Even thought the tops of the plants were chopped off, the base began to grow new leaves pretty quickly.

Cool Season Salad
I wasn’t sure how long this collection of greens would last, so I decided to pick a good deal of the lettuce, chard and endive and enjoy a cool season salad before these greens turn to brown.

Cauliflower Under Snow
While I was looking around, I noticed that one of the cauliflower plants had grown a very large white head, so I made an attempt to pick it. I tried using scissors without much luck, then I moved onto some hand pruning sheers, also without luck. I finally decided to pull the whole plant out of the ground, and found that a hammer was needed to break the stalk. I then cut off all of the leaves, and brought it indoors.

Cauliflower Ready to Cook
Cauliflower has never been my favorite vegetable, but I decided that since I grew it, I might as well give it a try. The process of cooking it was very easy. Start by cutting the large head into many smaller pieces, then place them into a microwave safe bowl, with water nearly covering them. The total cooking time is around 15 minutes, but they will need to be stirred every few minutes in order to cook evenly. When they were done, this single plant provided a cheese covered snack for about 10 people. I actually liked it !

Jennifer's Pumpkin
Later that same day the kids decided it was time to carve their pumpkins. I should note these were not grown in my garden, as I decided not to plant them this year.

Little Gardener's Pumpking
Maybe next year I’ll plant a few pumpkins from the seeds I gathered while carving. Either way, I know I will see a few, as the pumpkin guts harvested while cutting found their way to the compost pile.

Jessica's Pumpkin
You may also like:
 New Views
 Plants That are New To My Garden
 Breaking Ground for Cold Weather Crops
 Sandies Garden in August
 New Beans and Colorful Chard
 No Need For A New Arc
Life Beyond Tomatoes

Cart Full of Tomatoes - Photo by Sandra Macpherson
The valley is awash in a sea of ripening tomatoes. At one time it was acceptable to pick tomatoes every week or every 4 days, but that time has come and past. It’s become one of those occasions when all hands are required on deck, to pick, and pack this win-fall of healthy food. I try to help as much as possible, but the work continues even when I’m at work. My Mother, Sisters and Davie have been picking and washing off the tomatoes the last few days, and the cart above is full of tomatoes thanks to their effort.
I was told that if I would have stopped by while everyone else was helping, they were planning to pelt me with mushy red projectiles as I headed towards the front door. I’m reasonably sure the statement was in jest, but I’m glad I didn’t get to find out first-hand.

Jessica Looking at a Lot of Tomatoes
I was showing my niece, Jessica, and my nephew, the little gardener, just how much food we had produced in our garden. I’m sure both of them were just as amazed as I was to see sooooo many tomatoes.
Some of these tomatoes still need to ripen, while others have already been packed away in jars. The boxes on the floor to the right contain mostly canned tomatoes, some spaghetti, and a few boxes of other things.
The blue box labeled “Light” contains Pennsylvania home grown plums. They were a gift from a neighbor, and I hope to start a bunch of little trees from the pits.

Peppers
There is life beyond tomatoes however, and it starts with my other big crop for the season: Peppers. The ones shown are still a bit young, but I picked them anyway. There was a tiny chance that a frost was coming our way, and I didn’t want to loose out. While picking, I may have found a pepper plant that rivals Chablis Hybrid peppers in production. I don’t know what the name of these peppers are, but I planted them at least two weeks after the rest, and they are producing comparable amounts of peppers. I’ll be saving the seeds from these long green peppers and replanting them next year.

Saving Seeds
I’ve also been busing saving even more seeds. The peas that died a month or so ago left lots of seeds behind in dry, blackened pods. The trick to saving them for next year is simple. Take them out of the pod and keep them dry. I’ve been doing the same thing with my Ying-Yang Beans and Brown Crowder Beans. The Ying-Yang beans have been more of a pain to shell and so, I haven’t yet freed them from their pods.

"Dwarf" Bananas
My “Dwarf” Bananas are still growing very well, but with no sign of edible bananas. One of the plants is about four feet tall, and the other is at least five feet. They collect more light in my kitchens bay window they they let past, and I’m wondering what I’ll do in a few years when they have grown to the ceiling ? I guess I’ll have to add on a new tall sun room.

Opportunity Salad September Edition
The best part of a garden is the hope it gives you in the spring, and the reward it provides you in the fall. I wanted to eat something good the other day, but I’m about sick of lettuce, so I decided to make a salad without lettuce. Instead, I added some Swiss Chard, colorful tomatoes, cucumber, celery and onions. Add to that a touch of Extra Virgin Olive Oil, and you’ve got yourself a snack that would make any gardener smile. I was quite proud to notice that only the olive oil was from the store; I planted the seeds that grew the rest.
You may also like:
 I’ve Become a Tomato
 Tis the Season for Picking
 Tomatoes, Tomatoes, Tomatoes…
 Checking on the Tomato Patch
 Photos From the Tomato Patch.
 A bittersweet harvest
 2011 Tomatoes
 August 4th Harvest
 Tomatoes
Sandies Garden in August

My Niece, The Tomato Tester
I stopped by Sandy & Davies house to return a hydraulic jack I had borrowed, and just like any other time I visit, I had to check out their garden. My niece led the way into the tomato patch, where she sampled, and declared ready, many of the cherry tomatoes that were growing.

Cherry Tomatoes
I usually plant a few Red Alert cherry tomatoes in my garden, simply because they ripen sooner then the larger slicing tomatoes. Sandy is far more devoted to the cherries then I, and she even visited a commercial greenhouse to purchase these plants ( I usually start of all the tomatoes and peppers for the whole family in my greenhouse).

Waltham Butternut
I planted Waltham Butternut squash hoping to repeat the success I had last year, but the plants are doing poorly. Sandy’s plants are doing great though, and I often find myself wondering why our two gardens behave so much differently. I guess it’s got a lot to do with water and soil. My garden is sometimes too well drained, but Sandy’s garden tends to retain a good amount of moisture. Her garden also enjoys some shade from a row of trees nearby, where my garden is exposed to the direct sun like an ant in the Sahara desert.

Swiss Chard - Bright Lights
The Swiss Chard in both gardens are doing great. The colors alone are worth planting for, but having this plant be edible, and good for you is an extra bonus.

Celery
I couldn’t believe how well the celery plants were doing. These are the same tiny seeds that grew so slowly after I planted them 11 weeks before the last frost. They are nearly as tall as the zucchini plants in the row beside them, and it’s pretty amazing to see one of the harder to grow plants do well. I still need to work on my gardening skills with eggplant, kohlrabi, and pak choi, but I’m getting better every year.
Garden Stromboli

Peppers, Onions and a Hamburger
Finding something to eat for one person often is very easy, but unhealthy. This little recipe to pretty easy to work through, and I imagine it’s quite healthy too. The ingredient list is short:
1.) One or Two hamburgers
2.) A chunk of butter
3.) One or Two large peppers
4.) A medium to large onion
5.) One roll of Pillsbury Bread sticks with Garlic.
6.) One small jar of spaghetti sauce.
7.) Shredded Cheese
8.) Olive Oil
9.) Optionally add minced garlic and other veggies such as tomatoes, celery, zucchini, etc.
To begin, cook the hamburger meat in a frying pan with a chunk of butter, carefully crushing the patty into ground meat with a spatula. Add in chopped onions and peppers when the meat is nearly cooked. At this point you could add other veggies and chunks of a garlic clove.

Garlic Sticks
Next, place some aluminum foil over a cookie sheet, and spread some olive oil on the foil. Make sure to spread it around evenly. Unroll the bread sticks mix onto the foil. You may wish to cut the dough along the lines in order to make two smaller Stromboli.

Sauce, Hamburger, Onions, Peppers and Onion tops
Spread the spaghetti sauce on the uncooked dough, then add the chop meat and fried veggies, even distributing them. I’ve added some chopped up onion stems to the mixture, as well as lots of garlic salt and a bit of pepper.

Fold Over and Pinch the Dough
Next, fold over the dough, and pitch it together. You may notice in the photo how I had used tomato paste and added Swiss chard to the mix. Don’t do that ! The paste and chard together made these Stromboli taste like a bar of iron.
When you’ve sealed up the pockets, place them in the oven and bake until the dough turns a nice brown. I long ago lost the temperature setting knob from my stove, so I’d recommend you use the same method I did, start with a low temp, and slowly turn it up till the dough cooks.

Light Brown Color Means it's Done
You may wish to add additional veggies to your Stromboli, but I’d recommend you cook them before placing them on the uncooked dough. The stove doesn’t cook the veggies in the amount of time it takes for the bread to darken.
Some things to remember:
1.) Do not use Tomato Paste in place of the Spaghetti sauce. It’s gross.
2.) Swiss Chard will overpower all of the other tastes, and in my opinion ruin the Stromboli.
3.) Use olive oil on the aluminum foil. Without this protection, the dough will stick to the foil and make a mess.
Hope you like this recipe as much as I did when I got it right !
New Views

Sunflower
I decided to take some photos from odd angles in an attempt to find some really unique perspectives. I started with this sunflower, positioning myself so that the sun would be directly behind the flower. While to photo has some nice qualities, the seeds are washed out. I do like the colors produced as the solar rays passed through the petals, and It’s really cool to see a bug flying toward the flower in the top left hand corner.

Swiss Chard - Bright Lights - Yellow
I then decided to try a similar shot with some of my Swiss chard leaves, and I got a similar shot of tones produced as the suns rays ran through the leaf. The yellow in the photo is just how the plant looks in real life, and I have not altered the colors in any way.

Swiss Chard - Bright Lights - Magenta
When I decided to try some other angles, and avoid the sun, I pointed my lens at these festive chard leaves basking in the sun. In the background, peas grow to about 7 feet tall, and here they look enormous. The blue sky in the background gives the photo a quality of paradise, and this is often how I remember the valley when I’m away.

Purple Vienna Kohlrabi
Since I had already gotten dirty, I figured I’d take a ground level shot of the Kohlrabi I direct seeded. Here the base of the plant is about the thickness of a pencil, and it has a lot of growing to do before becoming the shape and size of a baseball if all goes well. I had wanted to plant kohlrabi after realizing I had missed it, and when I got to the seed section, they were our of most seeds, but they did have this purple colored variety. I figure it can’t taste too much different from the light green toned plants that sprung forth in last years garden.

Hammock
At the end of the day I decided to try my luck waiting for the ground hog to appear while my scope and generous supply of lead were nearby. Soon I found myself creating a hammock, and not long after that, I found my self waking up in it. So much for keeping an eye peeled. I guess it’s that time of year where I can relax a bit, so long as I can keep up with the weeds that constantly grow.
IT Farmer
 in Northwest Pennsylvania")
The Information Technology Farmer (IT Farmer) in Northwest Pennsylvania
NWPA Backwoods
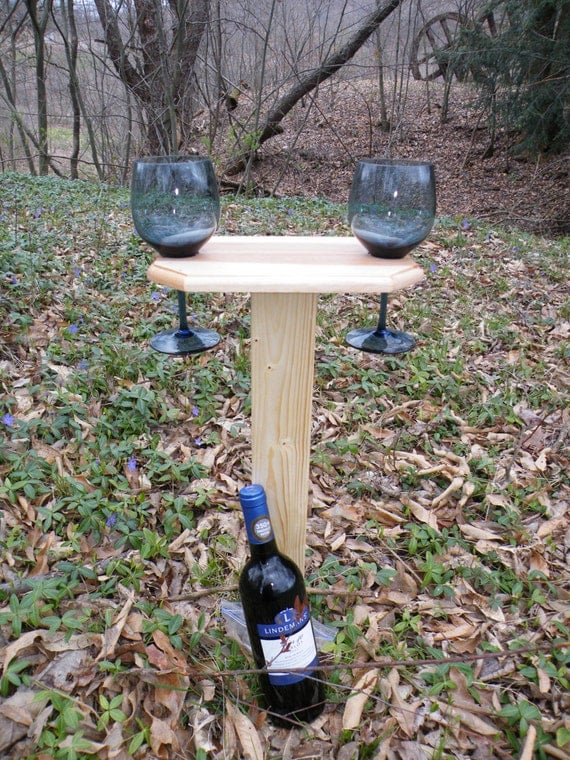 Outdoor Wine Glass Holder
I.T. Farmer’s Journey

Fight Global Warming

CO2

Going Simple

American Farmland Trust

ClustrMap


Comments: