Archive
Starting Early

Peach Pits
I’ve been waiting for several months to experiment with fruit tree seeds, and the time is about right to thaw them out and give them a shot. The seeds have been stratifying in my freezer for several months, which … [ Continue Reading at http://itfarmersblog.com/?p=2523 ]
It’s Begun

Celery Seeds in Dirt
I’ve been waiting patiently, restraining myself from starting any seeds till the time is right, and that time is now. The season begins for me with Celery, which should be started 11 weeks before the last frost, several weeks before most other seeds will be started.
This is only my second attempt at growing the crispy garden snack, and last year didn’t go so well. I was not aware of the long amount of time required by Celery for Germination, gave up on the seedlings too soon, and re-used the dirt for other seeds. Later in the season, I found one celery plant by luck.

Chard Under Cover
I ventured out to check on my chard cover over the weekend, taking a few pictures in the dark. I set my flashlight at the end of the small hoop-house, pointing the light towards the opposite end of the tunnel.

View from the Side
This tunnel setup is working so well that I may use it next winter in an attempt to grow Chard year round. The leaves which are not covered by the tunnel are wilting when they are covered with snow, but the plants under the protective cover are starting lots of new shoots, which should be edible in a week or two.

Concord Grape Canes
I finally got around to cloning a few grape vines. Jenny and I clipped a few canes from two vines on the farm, and I planted the clippings in these small ceramic pots. In the past I would have gotten carried away and started dozens of grape vines, but this year I’m trying to be more realistic, so I’ve only started a few. If your interested in the process for cloning your own vines, check out this post.

Grape Graft
I’m always trying new things as I figure if I do this enough times, I’m bound to figure out some pretty neat tricks. Since I’ve read about grafting fruit trees, and I’ve heard that the root stock will color the flavor of fruit which the scion bears, I thought I’d try something similar with grape vines. I started with two clippings, from two different vines, and fused them together as a apple scion would be fused to root stock. I used some candle wax to seal the bond, and prevent air from drying out the canes. I’m hoping the difference in the two types of grape vines will cause the grapes to have a very interesting flavor.

Fruit Experiment
Above is my latest experiment with cloning fruit trees. I put this together in haste, and it shows as my taping is very sloppy. You can see the buds beginning to open on the peach canes, and all of the other clippings are showing growth when you look close. I’ve gotten this far in the past, but I remain hopeful for this batch as I’m shielding the roots from light this time. Soon the clippings will deploy new leaves, and with some luck, they will grow new roots, which would be a step forward for my experiment.
Fruit Trees from Seed

Apple Seedlings

Apples, Pears, Plums, Peaches
I’m also starting some other types of seeds, ones in which the odds of success are very much stacked in my favor: Pears, Plums and Peaches. Here’s how I do it: Purchase locally grown produce, and get some kids to eat the fruit. Save the seeds, and let them dry for a day or so, then place in a zip lock bag, and store them in the freezer for about three months. Thaw them out, and place the seeds in a small tray of water till they begin to sproat. Place the sproating seeds in containers with Miracle Grow, covered with only 1/4 inch of soil at most. Keep the dirt moist. When the last chance of frost has pasted they can be moved outside.
Try, Try, Try Again: Fruit Tree Cloning

Sweet Cherry Cuttings
A few years ago, I learned how to clone grape vines. Ever since then, I’ve tried the same approach to clone other plants. I’ve managed to clone an Elderberry bush, a Lilac, countless Weeping Willows, even a tomato; but there is one category of plant I just can’t seem to clone: Fruit Trees. If I had the option, I would just give up cloning and resort to Grafting or starting plants from seed. Seeds are out of the question because the genetics of apples vary so widely that a seed from the best apple in the world will usually develop into a crab apple tree. Grafting would require that I have the proper root stock, something I haven’t found a way to order yet.
My only option left is to try, try, try every possible method to clone these trees. It’s something of a winter obsession for me.

Pear and Apple Cuttings
Red clips -> Pear; Blue clips -> Apple. The side with the colored clips are treated with root growing solution.
In the winter of 2009, I tried to use Miracle Grow as my rooting medium, with good initial success. The cuttings grew new leaves, but no roots. This year, I’m trying two rooting mediums, Sand and Garden Dirt. I’m also trying two planting styles, one with bare cuttings, and another with a solution that encourages roots to grow. I’ve moved my setup from my seedling room where the light was very bright in the morning, to my kitchen where the lighting is a constant shade. I’ve also used much less water in the base rooting medium, in an attempt to keep the cuttings from rotting. I’ll only add water with my misting bottle.To top it all off, I’m applying a small amount of Anti-Fungal agent, something I apply to my trees during the summer months.
I’ve started very early this year, and I hope to try three different approaches by spring time. My newest concern is if I will have enough cuttings for further experiments, as I’ve pruned three trees already.
Here Comes The Work Part of Winter

The Farm
I’ve been thinking about getting a jump start on the winter season by pruning my fruit trees and grape vines before it gets too cold, but Mother Nature apparently has a different plan. This morning, just as the sun was raising itself in the sky, I noticed the temperature at 5 F; Several inches of snow cover the ground, and I’ve found my plans for getting ahead of the season thwarted. I guess it’s for the better, as I’m still in need of my yearly Youtube pruning instructions for a quick refresher of the do’s and don’ts of tree trimming.

Fruit Trees Await Their Yearly Pruning.
When I’ve finished pruning these trees, I’ll have lots of cuttings to experiment with, so I’ll need to get some new ideas for cloning hard woods. I have yet to find a source which states that cloning fruit trees is possible, but I can be quite stubborn, and I won’t let this idea go. I’m going to try a sandy soil base this time, and mist the cuttings more so then in the past. I’ve learned that too much top growth can be bad for clones, so I’ll try to encourage root growth more then anything.
Grape cloning is another possibility for this time of year, and I’ll try not to get carried away again. I’d love to start new vines, as it’s one of the few signs of growth in the winter, but I simply have too many grape plants to tend already. I’m sure rational thought will go out the window however; when I’m knee deep in grape vine trimmings. I’ll wind up with a room full of grape vines, with no where to plant them. I’ll just have to pawn them off on neighbors and co-workers….
Mapping Progress

- Blue Concord

In the long term, I hope to clone most of the grapes which I’ve planted near the garden. The cloning part isn’t that difficult, but keeping track of each specific vine’s name over the course of several years may prove the hardest part. That’s where my Tiny Vineyard Map comes in. This morning, I walked around all of the now dormant vines, and noted each varieties name on a small map.

- Vine Map

I also decided that this blog may be the best place to store maps of various plants, so here’s a map of my small orchard as well:

- Small Orchard Map

I may need to amend this orchard map, as two of the small trees didn’t seem to be doing that well this fall. There are also two new sweet cherry bushes which would be on a third line below the Red Delicious and Cortland apples on the left hand side of this map.
Evening Shots

Apple Tree, Planted Last Year
On Friday, we had a gorgous sunset, and I had to share some of the photos I snapped. Above is a Apple tree that I planted last year. It’s still very young, and won’t likely bear fruit for many years. To capture the green in the leaves, I had to set my camera to “Forced Flash” mode. The camera would normally judge the amount of light, and decide not to use the flash, but this leaves only a shadow of the tree in the picture.

Cloning Grapes
Here is a shot of some of the Cloning Grapes. I believe these are “Giant Green” Seedless. They are still very short, having just grown past the first wire that will support them. The colorful strands of wire were part of a larger cable, which had a bundle of four thick copper cables. I’ve made it a point to cut through the plastic jacket and expose some of the copper. Copper deters many things such as Late-Blight, and I’m hoping it will help the vines as tiny amounts of the mineral leach into the soil.

Sea-Buckthorn
Here’s a “Sea-Buckthorn” plant. I have been quite worried about these transplants, as the heat has really been brutal to them. The soil they are planted in is normally pretty dry, and in this heat it is like a desert. I’ve been watering them daily, and also added some grass clippings and garden soil around the base to hold in the moisture.

Kentucky Pole Beans
Last but not least is the pole bean trellis. Some of the Beans have grown all the way up the trellis, and they are just getting started. These plants grow so fast that the weeds aroung them look spindly, and unhealthy. It’s nice to see the weeds struggle a bit for a change. Behind the beans are the Yukon Gold Potatoes, and the luminous sky in the background wasn’t quite as red in real life. I believe the flash fooled the camera into changing the color a bit. It’s all good though, as it makes a wonderful photo.
A Broader View of My Gardening Ambitions

The "Entire" Garden
Here’s a picture of my larger garden, the one that includes Fruit Trees, Grapes and Various Cherries and Berries. The idea I’m shooting for is to build a more permanent garden around my seasonal garden.
The tall posts placed in the ground support five strings of cable, which will eventually hold grape vines. Most sources suggest two or three strands, which are actually part of the pruning process. My plans differ due to the plans for these grapes. There are ten different types of grapes, and I hope to let them grow out of control for several years. This will create a massive set of roots. When the plants are large enough, I hope to use these out of control bushes as a source for cloning canes. I’m not interested in the quality of grapes which will grow from these vines, I’m interested in plants that can support heavy cuttings each year. I can use these cuttings in my process of cloning, from which I can grow quality grapes. It’s generally a long term plan.
Next to the grapes, and barely visible in this photo are some Tart Cherry Bushes. They set lots of medium sized cherries, that are used mostly for pies. The row past these contain Elderberry bushes, a personal childhood favorite.
Towards the left of the photo are the some Fruit Trees. They run across the crest of a small hill which is not really visible. I have Pears, Apples, Peachs and recently added Plums.
Out of the range of this photo are many more plants, but include the following: Apache Blackberries, Sea Buckthorn, Pixwell Gooseberries, Saskatoon Blueberries, Conventional Blueberries, Niagra Grapes, more Tart Cherries, a couple Lilac Bushes, and a few more Fruit Trees.

Tomatoes and Peppers
I also wanted to include a picture of my tomato rows. It was taken after a heavy rain, which is why the peppers look so worn out. This year, we managed to plant everything in fairly straight rows, that look quite amazing from across the valley. I still haven’t quite figured out why I planted so many, nor what to do with them when I get overwhelmed with hundreds or even thosands of tomatoes……. Should be interesting.

Onions Going To Seed
I also wanted to share this very unique photo, which showcases an onion plant in it’s seed growth stage. Each of these little white pods contains the potential to start a new onion plant. I’m not sure if the timing of this is right, or even a good thing, but I’m pretty sure if I let them all sprout seeds, I’ll never have to plant onions agian. I don’t think I’ll ever be able to grow a different crop in this part of the garden if I do let them turn to seed. I guess you live an learn what you can.
Weekend Roundup 4/24/10

Making an Orchard Map
The weekend started off easily enough, with plans to make a map of my small orchard. I walked around and took pictures of each identifing tag, and added each varieties name to a map. I’ve used a small piece of wood for my map, and a pencil to write on it. The scrap wood will be hung up in the greenhouse, and hopefully, It will be readable long after the tags on the trees blow away. This happened to the row of trees in front of my house, and so, I can’t identify which types of fruit they are. I plan to graft trees in the next few years, so it’s important to document which variety each tree is.
After finishing the map, I went inside the house to take a look at my second batch of chicks. To my suprise, 7 of the eggs had cracks, and the chicks were already chirping to encourage each other to break free. The chicks would soon need to be moved out of the incubator, and I wasn’t prepared. I thought I had two more days to build the larger chicks a new home, I was wrong. So now I had my work cut out for me. Luckily Sandy, Davie, Nate and Kareese were available to help. We got started working in the greenhouse to build a new home for the first batch of chicks. One of the few places I had room for the chicks was under one of my water tables.

Chickens in the Greenhouse
As you can see above, this arrangement works pretty well for now. I plan on building a chicken house soon, but this will work for the time being. With the larger chics out of the house, the chick pen had to be cleaned out, and it was; just in time for the first 8 chicks.

Second Batch of Chicks
Here is my second batch of chicks. I was quite happy with this batch as the chicks are all different colors. I even have two gray chicks. Before that day, I had never heard of a gray chicken, and too have two of them was neat. Now my work for the weekend was complete. I decided to walk around and take stock of the plants I’ve been diggin holes for. The elderberries I transplanted from Sandy & Davies farm are doing pretty good; the Rose-Hips not so well, but I still think the roots will make a pretty decent come back; The cherry bushes are doing great, as if they were never disturbed. I still need to plant rows of interesting new plants I’ve ordered. They are Saskatoon Blueberries (Juneberries), Sea-Buckthorn, and Pixwell Gooseberries.

Onions waiting on Rain
Here are the onions, complete with rows of weeds in between. You’ll find I’m not much of a garden weeder. My take on weeds is, if they are six inches away from garden plants, then they don’t need to be ripped out. There’s no point in it. I should point out: If you don’t cover your onions with hay, or straw, their will be many, many more weeds, I learned that last year =).
Another Attempt to Clone Fruit Trees…

Latest attempt to Clone Fruit Trees
I’ve been a bit obsessed with cloning Fruit trees this winter, and I’ve tried many, many methods. Just before trying the method shown in the picture, I tried the exact same setup, with paper cups. The result was gross…. Mold grew all over the cups, and eventually killed the clippings. So, I’m trying it again, with steril plastic cups, and a small scale steril greenhouse of sorts. I’m using a brand new plastic shoebox that has been washed out with soap and hot water. The lid of the shoebox is my base, and I’m using the transparent portion to shield the fragile plants from mold spores, and other dangers that might be lurking in the air. I’m treating the whole setup as if it is a microchip in a clean room.
These are all pear clones except the cup with a small piece of blue styrofoam on it. That plant is a plum tree.
So here is the process that I have used to get this far:
1.) I start by pruning the undesired portion of fruit trees. There are many videos on youtube about this.
2.) I “plant” the clippings in Miracle Grow Potting soil, which is compacted around the base of the plants. Then, I take the pot of soil, and the clipping, and place it into about an inch of water.
3.) The clippings buds will open, and begin to grow. Most of the buds will open up around the same time, but I’ve given them a few weeks of time to grow. When one of the buds leaves begin to die, or dry up, I take a very sharp knife, and cut off the small green shoots, taking care to leave about a 1/16 to an 1/8 inch of brown bark on the base. I then dipped this bark portion in water, and then into some heavy duty rooting hormone.
4.) Finally I place the cutting into the plastic cup filled with some Miracle Grow and Peat Moss.
5.) Pour enough water into the plastic cup to keep the plant from drying out.
6.) Cover the plants to keep out…. anything bad. I’m not sure what is killing my previous attempts, but covering them shouldn’t hurt.
If this doesn’t work, maybe I’ll find some root stock, and start grafting trees instead.
Edit: 4/6/10 This attempt did not work, although the trees lived longer with this method. I think this could work if some steps are added, such as a mister or tempurature controlled enviroment.
IT Farmer
 in Northwest Pennsylvania")
The Information Technology Farmer (IT Farmer) in Northwest Pennsylvania
NWPA Backwoods
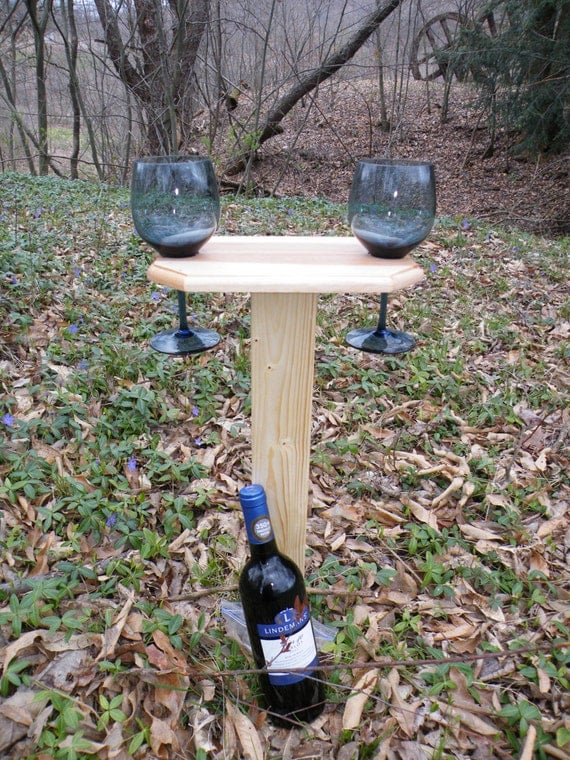 Outdoor Wine Glass Holder
I.T. Farmer’s Journey

Fight Global Warming

CO2

Going Simple

American Farmland Trust

ClustrMap


Comments: